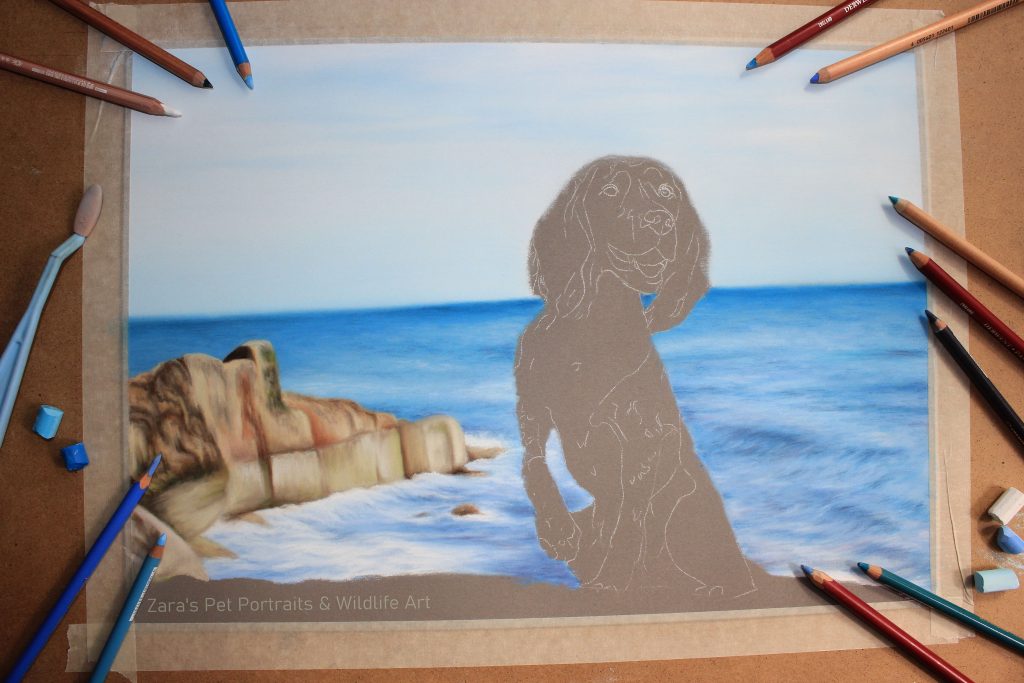
I am still new to pastels. This was the first scenic type background I have attempted with pastels. The reference which I posted here in a blog post a few days ago shows that the background was more out of focus but still had enough detail in the sea and rocks which I really enjoyed capturing. I wanted to make a blog post covering a few points for approaching something like this for the artists that follow me :).

Materials..
For the background I used a combination of soft pastel sticks and pencils. The base layers for the sky and sea had 2-3 layers of soft pastel and blended out with that Sofft Tool on the left. This is by far my favourite blending tool for base layers. I don’t use these tools for blending top layers as I find it actually blends way to much and takes the pastel off. But they are perfect for larger areas and base layers. They create a gorgeous soft finish perfect for adding any subtle detail on top. My paper I use for pastel portraits is Pastelmat. The soft pastels are Rembrandt and the pencils I use are from 4 sets including Pitt Pencils, Carbothello, Derwent and Caran’ D’Ache.
Background or subject first…
When working on my pastel portraits I always do the background first. There is a couple of reasons for this. The first being I want to make sure the pastel dust does not transfer over onto my subject where I spend hours capturing all the detail. I wouldn’t want to ruin that with blue from the sea or sky accidentally blowing across onto the Spaniel. The other reason is, should I make a mistake on the background or I find there is a issue with the paper (not experienced this but just in case) I would hate to have worked on the main subject to then find there is an area of paper that doesn’t take the pastel and I cannot get the finish I wanted. Like I say I haven’t yet come across an issue with the paper surface as Pastelmat is a fantastic surface to work on but you never know and its just how I feel best to work.
Tip
This may be because pastels are a newer medium to me and although I know how to get to the finished end result I do at times stumble across potential issues that other artists may not know how to tackle or work around.
When working with soft pastel sticks, now I have only used Rembrandt so this may be where I need to experiment with other brands, but work in light layers. I have found that as with any paper, if you fill the tooth of the paper with too much pastel to early its difficult to add layers on top. So add a light layer, blend with the Sofft Tool and then reapply another light layer. Do this until you get the background you want. If you do reach the point where you have filled the tooth you can use a workable fixative to add more tooth but I personally do not like fixatives. They change the colour of the pastels, spit and leave blobs on your work and its just not a risk I am willing to take and ruin hours of work.
I have found that with pastels it is very easy to want to push hard with the pencils or sticks. Pigment goes down on the paper so easily due to the velvety, slightly textured paper it grabs it and its so easy to want to apply more pressure to get that texture of the paper filled immediately. Don’t do this. All for the sake of spending a few more minutes adding a couple of lighter layers and blending between with make all the difference.
Video being uploaded so you can see for yourself 🙂
I have the full time lapse uploaded to my YouTube channel in a few minutes time from this blog post going live. I will share that here tomorrow for you to watch which shows exactly what I am doing from start to finish. This is the first background I have recorded in pastels so I hope you find it of interest. I’d love to hear what you think either in the comments section on the video itself over on YouTube or the Facebook post in my page or group :).
